 | English
| Deutsch
ZAR1+, ZAR5, ZAR7, ZAR8, ZAR1W: Grinding notch by machining allowance q

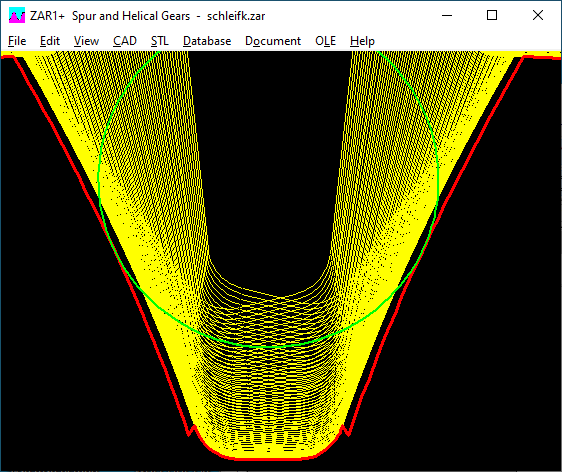
Once again a customer sent a tooth profile picture with an edge from the transition from the involute to the tooth root fillet with the question of whether this was a bug in the software. A check of his calculation file showed that a machining allowance q was entered, but a normal reference profile (no protuberance profile) was used. Then there are grinding notches, and these can also be seen in the tooth profile picture.

Inexperienced users may not understand what "machining allowance q" means and they simply click on the default button "<". Therefore there is now a change in the program: a proposal for the machining allowance is only made if a protuberance profile has been defined beforehand, otherwise q = 0 is set. The proposal for the machining allowance has also been adjusted: 80% machining allowance plus 20% tolerance, instead of 50% + 50% as before.
ZAR1+, ZAR5, ZAR7, ZAR8, ZAR1W: Root form diameter dFf if protuberance
Under "CAD \ Settings" you can now tick "xev", then the root form circle diameter in the case of a protuberance profile is calculated at the point where the ground involute merges into the milled involute. If the protuberance has only been partially ground away, this root form circle diameter can only be determined graphically by exporting to CAD and measuring. Otherwise ("xev" not checked) the root shape diameter is calculated as before at the point where the involute merges into the tooth root fillet.
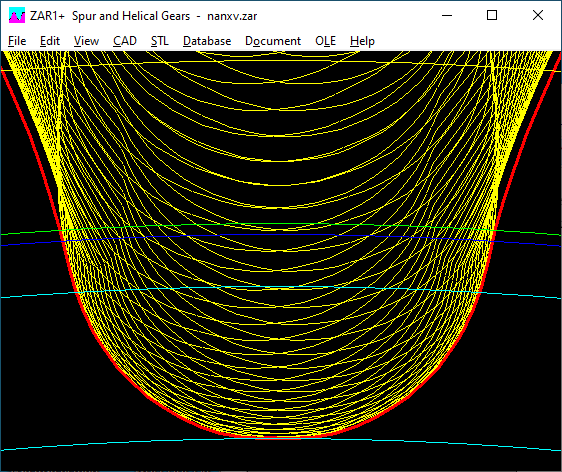
Dark blue: tooth root form diameter dFf
Green: usable base circle diameter dNf (through counter gear)
Light blue: base circle diameter db and tooth root diameter df
ZAR7, ZAR8: Export ZAR1
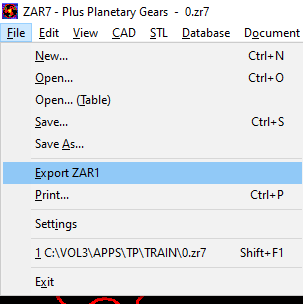
In ZAR7 and ZAR8 you can now select one gear pair (sun-planet, planet-planet, planet-ring gear) and export it to ZAR1 +.
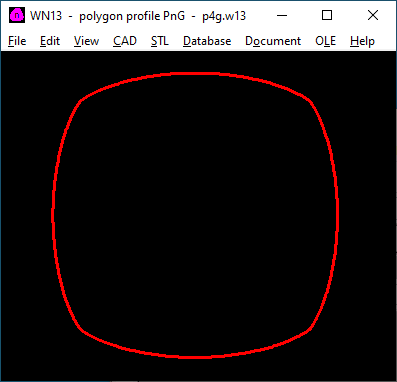
WN13: Software for polygon profiles PnG
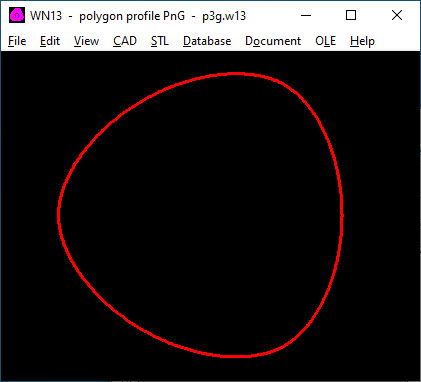
With WN13 you can calculate P3G profiles according to DIN 32711, but also with other numbers of teeth (P2G, P4G, P5G, P6G). WN13 thus replaces WN6, the calculation of dimensions and profile curve are identical. Surface pressure and minimum wall thickness are not calculated in accordance with DIN 32711, but in accordance with DIN 6892 (surface pressure parallel key connection) and DIN 7190 (minimum wall thickness of interference fit). Files from WN6 can be imported.
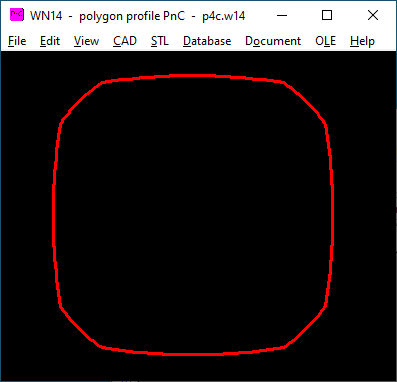
WN14: Software for polygon profiles PnCl
With WN14 you can calculate P4C profiles according to DIN 32712, but also with other numbers of teeth (P2C, P3C, P5C, P6C). WN14 thus replaces WN7, calculation of dimensions and profile curve are identical. Surface pressure and minimum wall thickness are not calculated in accordance with DIN 32712, but in accordance with DIN 6892 (surface pressure of parallel key connection) and DIN 7190 (minimum wall thickness of interference fit). Files from WN7 can be imported.
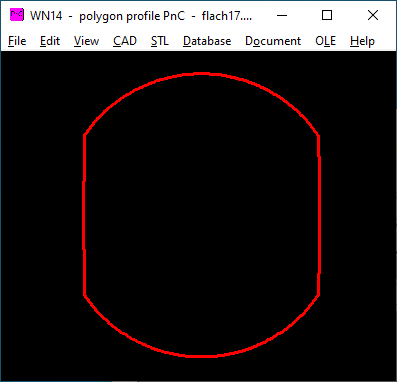
You can also calculate a flattened shaft: enter the outside diameter, inside diameter = width across flats, eccentricity is theoretically infinite, but e = 1000mm is also sufficient.
WN13, WN14: Flank pressure in PnG and PnC profiles
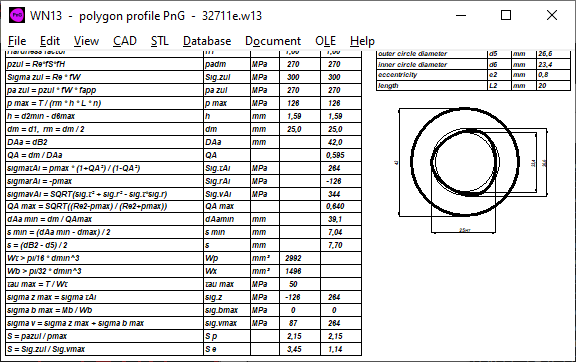
How is the surface pressure distributed over a PnG profile? At the largest and smallest diameter, the surface pressure due to radial force should be highest and due to tangential force lowest, in the middle there is surface pressure due to tangential force and radial force.
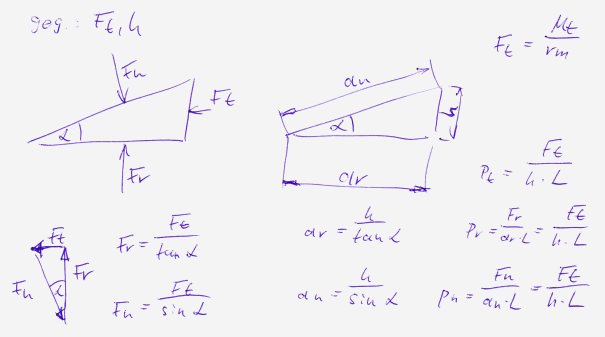
Let us consider the surface pressure on a wedge. One might expect the surface pressure to be highest where the force is greatest. In fact, the force and contact area are proportional, which is why the surface pressure on the wedge is the same everywhere: p = Ft / (h * L)
With this knowledge, the surface pressure for PnG and PnC profiles can be calculated in the same way as for other multi-tooth profiles from torque, mean diameter, length, tooth height and number of teeth:
P = F / A = T / (rm * L * h * n)
If you use the diameter designations from DIN 32711 and 327122, the mean radius rm for PnG: rm = d1 / 2 and for PnC: rm = (d1 + d2) / 4.
In the case of a press fit, the surface pressure increases by
p = Pu - f * (Rz1 + Rz2) * modulus of elasticity / (dm * Qk)
This is not taken into account in WN6, WN7, WN13 and WN14 for the time being, nor in DIN 32711 and 32712.
WN13, WN14: Calculate minimum wall thickness of the hub
In DIN 32711 and 32712 there is a simple approximation formula for estimating the required hub wall thickness:
s = f * SQRT (Mt / (Sigma z, perm * L))
With
Sigma z, perm = Re
L = hub length
Mt = torque
f = application factor:
f = 1.44 for P3G with d4 <= 35mm
f = 1.2 for P3G with d4> 35mm
f = 0.7 for P4C
Strangely enough, in this formula the minimum wall thickness only depends on the hub length, the diameter is not taken into account.
In WN13 and WN14, however, the minimum wall thickness is derived from the formulas for stresses in the interference fit. The greatest tangential stress occurs on the inside of the hub:
Sigma tAi = p * (1 + QA˛ / (1-QA˛)
With QA = outer diameter of hub (dAa) / mean inner diameter of hub (dm).
Limiting the maximum tangential stress to the yield point (Sigma tAi = Re) and changing the formula to QA results in:
QA = SQRT ((Re + p) / (Re-p))
With QA = dm / DaA and wall thickness "s = (DaA - dm) / 2" the minimum wall thickness becomes
smin = dm / 2 * (SQRT ((Re + p) / (Re-p)) - 1)
With this formula, the surface pressure pmax must be smaller than the yield point Re, otherwise the wall thickness will be infinitely large. In the case of the interference fit (calculation with WN1), the yield point may by all means be exceeded; one then speaks of the elastic-plastic state of stress with partially plastic deformation. Since PnG and PnC connections are used more than detachable connections, it makes sense to limit the surface pressure to the yield point Re.
It is true that the permissible surface pressure according to DIN 6892 is higher than the yield point (pzul = Re * fS * fH) because compressive stress may be higher than tensile stress. But because the surface pressure on the hub generates at least the same tensile stress, the surface pressure at least on the hub must be less than the yield point of the material.
When comparing the calculated minimum wall thickness with DIN 32711 and DIN 32712 using the calculation examples in Appendix A (P3G and P4C with nominal dimension 25mm and torque 150 Nm), the results are surprisingly almost identical: s = 7.0mm (7.2 according to DIN) for P3G and 3.8mm with P4C (3.5mm according to DIN). But this is also due to the fact that in WN13 with pmax = 126 instead of 96 MPa and in WN14 with pmax = 84 instead of 51 MPa. Or it is a coincidence because the DIN approximation formula does not even take into account a diameter (lever arm) and thus tangential force and surface pressure.
WN13, WN14: Extension of hub outer diameter by pmax
With the formulas from the calculation of interference fits in WN13 and WN14, the maximum expansion of the hub at the outer diameter is calculated. This may be important if the hub e.g. is a gear.
All Programs: Decimalpoint setting
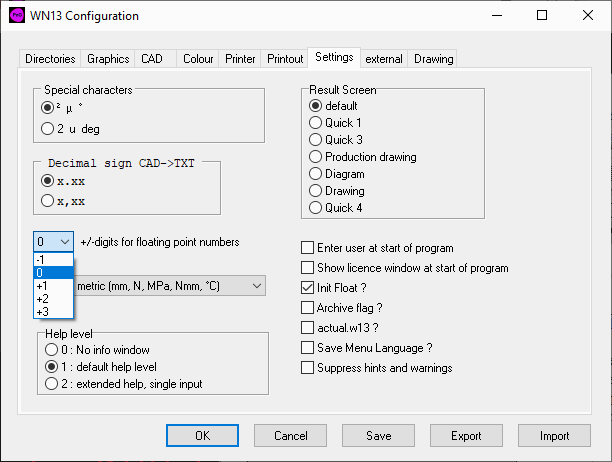
At File\Settings, text for decimal point was changed: instead of 2,3,4,5 it now reads –1.0, +1, +2. The default setting is 0. With "-1" numbers with 1 decimal place less are displayed, with "+1" with one decimal place more. With the old representation, users complained that numbers were not displayed with the selected number decimal places. But it doesn't make sense to output large numbers with 2 to 5 decimal places (F = 9567.567 N).
Software maintenance invoices with 19% VAT
Strangely enough, German software maintenance bills incur 19% VAT because the "end of the performance period" is 2021. We were made aware of this by customers and the invoices had to be changed.
Corona test instead of "Volksfest": "Wasenhelfer" wanted - found
Can previously healthy people become infected with the virus during the corona test? Very likely if you see how the helpers hold people in the face with their rubber gloves. The city of Stuttgart needs new helpers for the new corona test center on the Cannstatter Wasen and is calling on students in particular to apply. Minimum requirements: none. It would make more sense to program robots for corona tests. Then every move is perfect, and the robot colleague could reliably disinfect itself after every smear.
Right to Homeschooling in corona times
As expected, travelers have brought the coronavirus back from risk countries. Then it was widely distributed through schools, kindergartens, workplaces and private parties. Pupils cannot protect themselves against infection, they are forced to attend classroom lessons. The minimum distance cannot be kept because the classrooms are too small. Masks do not protect if you sit together for hours. Therefore, the responsible politicians should better demand a right to work from home for students rather than workers. Those who want face-to-face lessons go to school. And those who want to stay at home have to do homeschooling. The effort would be manageable: put assignments and worksheets on the internet and the teacher gets a microphone and a camera.
For companies, on the other hand, an official right for employees to work from home makes no sense. An entrepreneur hates nothing more than superfluous regulations by incompetent officials and politicians.
Toll dodger
What kind of type the German transport minister is, you can see from the justification and the time of his terminated toll contracts: Justification: Quality defects on the part of the suppliers. Time: immediately after the courts rejected his toll plans. Quality defects in products that have not yet been delivered and are no longer needed. The complete opposite of a "respectable businessman". I wouldn't sell him any software.