English
Deutsch
Info Letter No. 48 - April 1998
Copyright by HEXAGON Software 1998
ZAR1+ Manufacturing Drawing
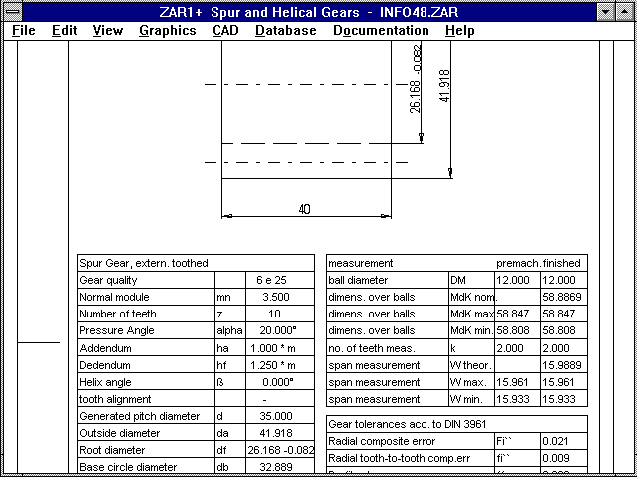
As for pressure springs, the spur gear calculation now includes a
complete drawing form with all necessary table values for the gearing
manufacture. Changes are entered in ZAR1+ and then transfered to the
change index on the drawing. It is now also possible to link company
"documents" to any program, e.g. for additional information, CAD
drawings, working plans, etc. The drawing can be generated as a DXF or
IGES file and then transfered to CAD. Or, you can use our additional
program, DXFPLOT to print the drawing out directly on a plotter or
laser printer.
I would like to thank Mr Henzler, Mr Duerrscheidt and
Mr Layer of Robert Bosch, Murrhardt, Germany for this idea.

ZAR1/ZAR1+ Tool Root Concave Rounding
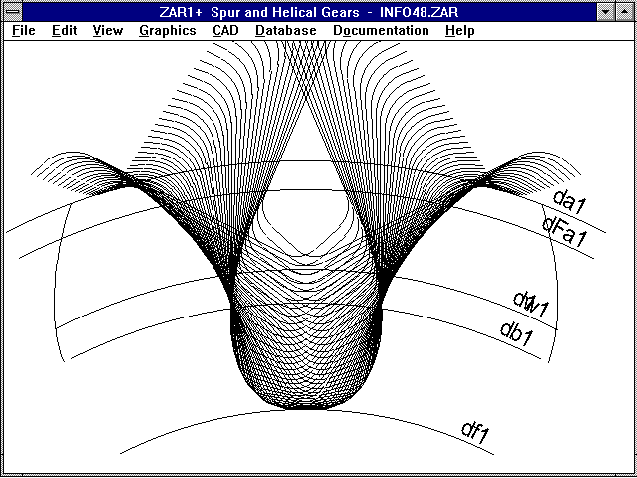
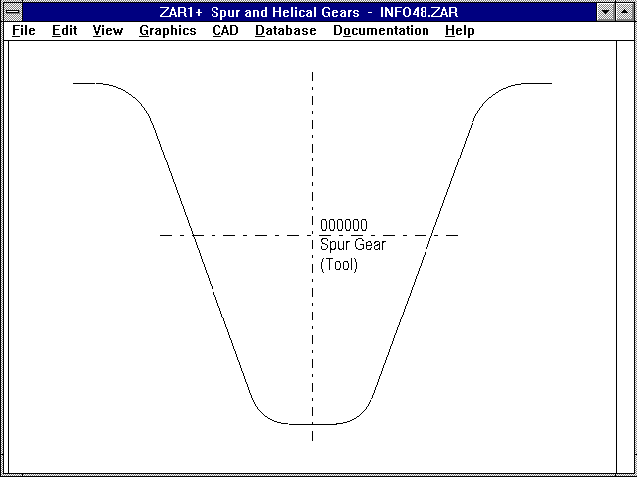
 The new version of ZAR1 and ZAR1+ allows entry of a root concave
rounding value (rhoFPO/mn) for the datum profile of the gearing tool.
Over-cutting tools, when used to finish the outside diameter (kmn=0) of
the gear, may result in rounding off on the tooth tip. The rounding off
has no influence on the finished tooth when there are a small number of
teeth with a positive addendum modification coefficient. I would like
to thank Mr Koerner of Voith Turbo in Heidenheim, Germany for this
suggestion and the documentation.

ZAR1+ Data Base Datum Profile
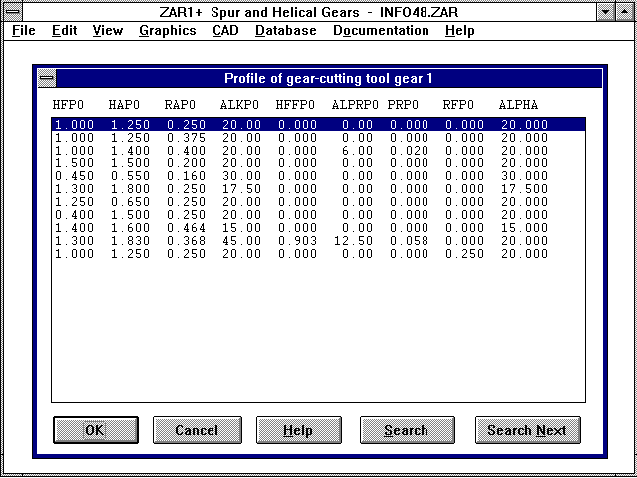
 The fields RFP (tool root concave rounding), ALPHA (pressure angle) and
MODUL (normal modulus) have been added to the data base Z1TOOL which is
now available under the new file name Z1TOOLX. The information fields
NR, D, B and ART can be filled with an internal company drawing number,
diameter, width and type. A warning appears when the modulus from the
data base does not match the normal modulus of the calculation.
WL1+ Export Excel
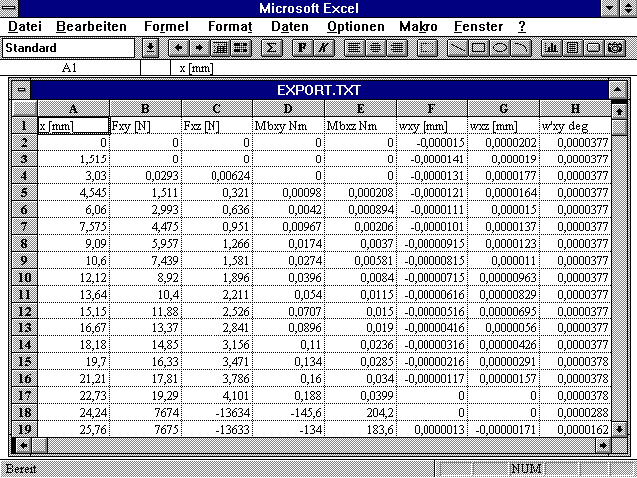
 The diagram values can now be saved as text files under "Export
Diagram". These text files can then be opened under Excel, Star-Office,
etc., and be used as spread sheets. In WL1+ the buckling calculation
for axial forces can now be deactivated under "Edit->Calculation", this
reduces calculation time.
WL1+ Surface Moment of Inertia
The axial surface moment of inertia for shaft sections is no longer
provided. Until now, Iy has only been provided for cylindrical
sections, as it is variable for conical shaft sections. The formula
for calculating the surface moment of inertia of circular ring
sections is as follows:
Iy = pi/64 * (De^4 - Di^4)
DBFEDIT for Editing the Data Base
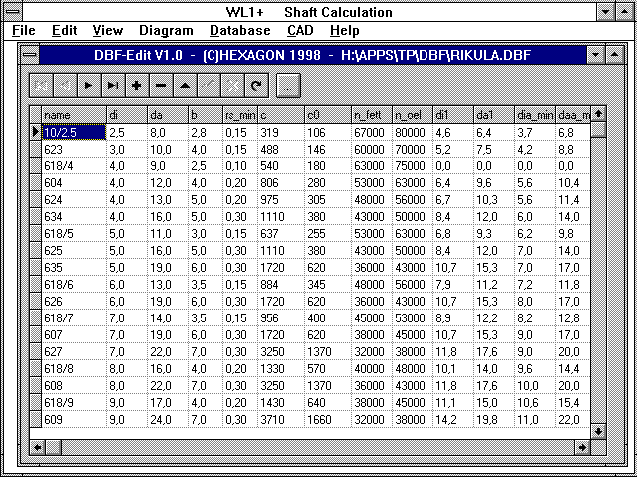
Under the "Database" Menu, you can alter and append all the data bases
delivered with the calculation programs. However, the built-in DBF
editor is a little difficult to use. As an alternative you can use an
external data base. In order to do this you configure an external data
base program under "File->Settings->External Programs". Enter the file
name and the directory path for the program. We are offering an editor
for the DBF files. The editor is called DBFEDIT and is available free
of charge, on the internet under "www.hexagon.de/history/tools/". There
is a version "dbfedi16.zip" for Windows 3.1, "dbfedi32.zip" for Windows
95 and NT. DBFEDIT has an advantage over the earlier editor "DBBROWSE"
in that it doesn't require the "Borland Data Base Engine" to work.
DBFEDIT can be integrated into the calculation program. The integration
of any external data base program is possible with all Windows versions
of HEXAGON software since June 1996.

SR1 - Drawing
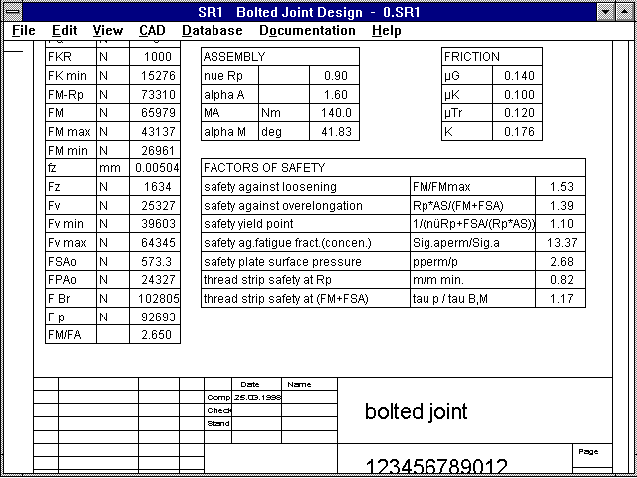
By using our calculation program DXFPLOT, you can print out a drawing
of the calculated bolted joint on a plotter or laser printer with all
the important dimensions and calculation results. Print out is also
possible via the DXF or IGES interface to CAD. Drawing data (name,
date, replaced...) and changes can be entered under the sub-menu
"Document".

SR1 - Tensile Strength Auxiliary Lines
Auxiliary lines up to breaking point are shown as dashed lines in the
M-alpha and FM-MA diagrams. The lines are displayed as dashed because
the program cannot take the additional remaining overstrain into
account as shown on the stress-expansion diagram occuring after the
yield point.
SR1 - Fatigue Limit
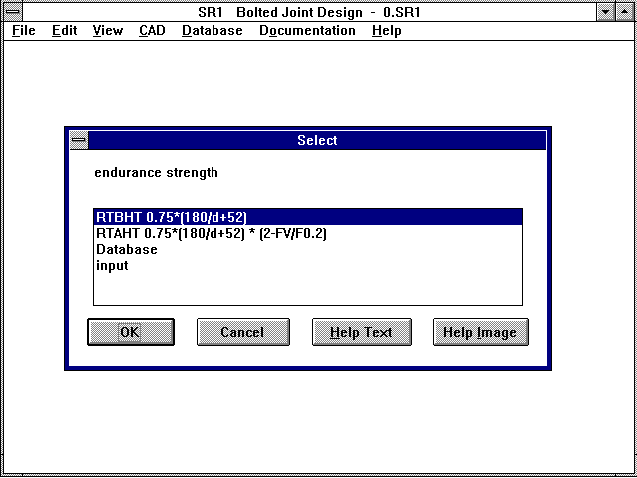
Until now the calculation has generally used the values and formula
from VDI 2230 (diagram 48) to calculate the permissible endurability of
the bolt. Since the values are only applicable to finished tempered
bolts of the durability classes 8.8, 10.9 and 12.9, you can now
alternately enter the alternating strength Sigma A. Or select
MAT_B_SA.DBF from the data base. The value Sigma A, can be entered in
the data base as the function of the thread diameter. For this
information and documentation I would like to thank Mr Ralph Shoberg of
RS Technologies, Farmington Hills, USA.

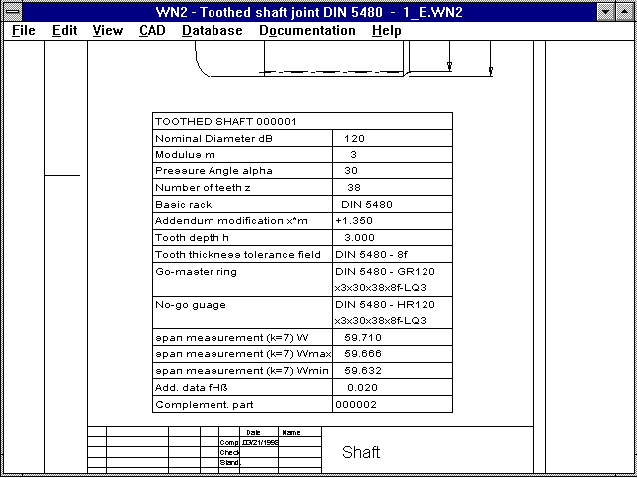
WN2 - Manufacturig Drawing
It is now possible to generate a drawing with a table of the most
important toothing data for the tooth shaft and hub. As for the spring
programs, WN1, SR1 and ZAR1, drawing data and changes can be entered
under the sub-menu "Documentation". Links to other documents can also
be generated. I would like to thank Mr Wesierski of Somatec,
Giesendorf in Germany for this idea.

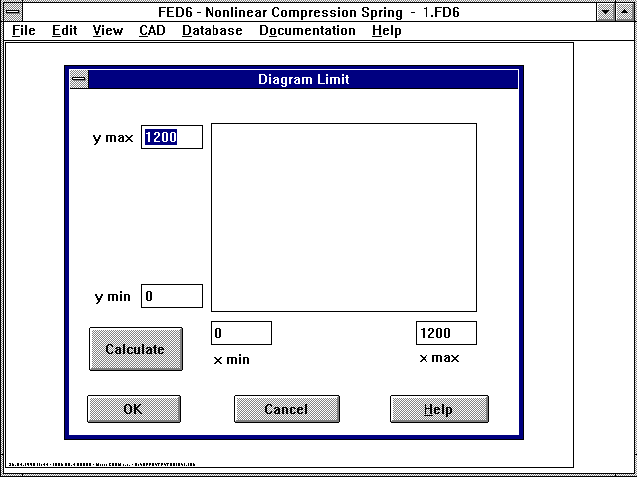
Diagrams - Configurable Limits
 The scale of the y axis of diagrams is calculated by the program in
accordance to the greatest and smallest values in order to create a
diagram which fills the available format. In order to compare several
calculations by laying the diagrams on top of each other the scale
start and end values must be identical. In the new versions (Windows
only) you can determine the scale start and end values of the x and y
axis under "CAD->Diagrams". With "Calculate" you can calculate the
program-suggested values before doing this. The new option can also be
used to show sections (zoom window).
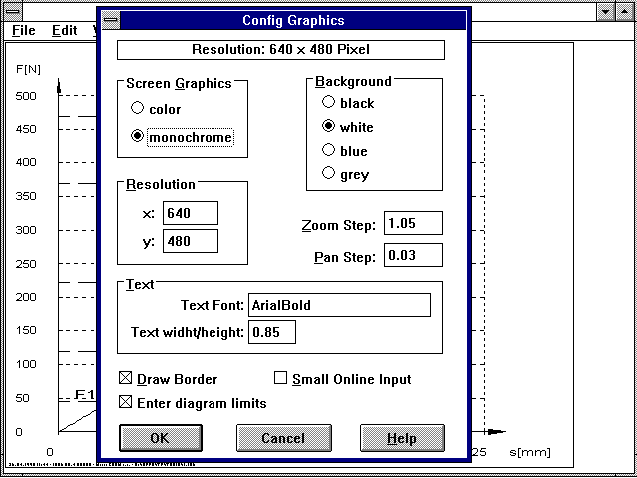
 The input window only appears when you have checked the box "Diagram
Limits" under "File->Settings->Graphic". I would like to thank Mr
Wirth of Wirth-Springs in Undeloh, Germany for this suggestion.
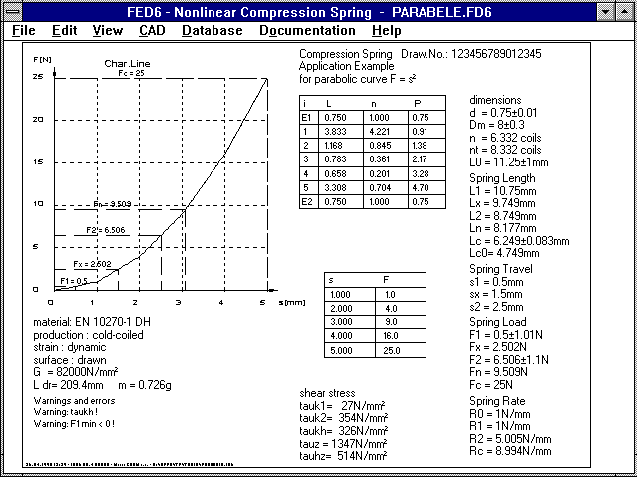
Spring Programs - Excerpt
A table including spring loads, travels, lengths, stresses and safety
margins is included in the spring programs' short printouts. This can
sometimes be confusing because the stress correction factor k is taken
into account for dynamically loaded springs with the indeces 1 and 2,
whereas for the usable length n, and block length c, it is not taken
into account. Due to this, it can occur that a higher stress is shown
for tauk2 than for taukn, although the spring path L2 is smaller than
Ln. For the application there must be enough safety for the elevation
stress Sh=taukhzul/taukh and for the upper stress S2=tauzul/tauk2. When
the spring is inserted under block, a (static) safety margin
Sc=tauzul/tauc>=1 must exist. In order to better demonstrate the
relationship with and without the stress factor k, two additional lines
have been added to the dynamic load which show the dynamic factor k's
increased values for the positions n and c.
Dynamically Loaded Compression Spring Excerpt
De = 17ń0.15 mm d = 2ń0.035 mm w = 7.5 k = 1.18
n = 9.235 nt = 11.24 nt-n = 2
tauz = 876 N/mm˛ tauhz = 570 N/mm˛ Rm = 1565 N/mm˛
======================================================================
Spr.Length.mm Spr.Path mm Spring Load N tau N/mm˛ S
======================================================================
L0= 38.00ń0.89
L1= 35.00 s1= 3.00 F1= 15.27ń4.69 tauk1= 86 10.14
sh= 7.00 Fh= 35.63 taukh= 202 2.83
L2= 28.00 s2= 10.00 F2= 50.91ń5.03 tauk2= 288 3.04
Ln= 27.97 sn= 10.03 Fn= 51.05 taukn= 289 3.03
Ln= 27.97 sn= 10.03 Fn= 51.05 taun = 244 3.59
Lc= 22.86 sc= 15.14 Fc= 77.06 taucn= 436 2.01
Lc= 22.86 sc= 15.14 Fc= 77.06 tauc = 368 2.38
----------------------------------------------------------------------
(S = tau zul. / tau y)
For all springs, the index n stands for the usable spring path. The
definition for compression springs however, is completely different to
that for extension and torsion springs. For compression springs the
usable spring travel is defined as the block spring travel minus a
safety margin Sa. For extension and torsion springs the spring travel
or spring angle at which the permissible shearing or bending stress is
attained. For compression springs, tau n can be greater or smaller than
tau zul, but for extension and torsion springs tau n is always equal to
tau perm or sigma n is equal to sigma perm. The table in FED2+ and
FED3+ has been appended by the stress correction values. However, the
reduced spring path, spring forces and spring moments at which the
permissible stress under dynamic load are attained, are shown instead
of the increased stress for sn. Excerpt of a dynamically loaded
extension spring:
De = 10.05ń0.25 mm d = 1.3ń0.015 mm w = 6.73 k = 1.21
tauz = 777 N/mm˛ tauhz = 397 N/mm˛ Rm = 1726 N/mm˛
======================================================================
Spr.Length.mm Travel mm Spg.Force N tau N/mm˛ S
======================================================================
L0= 27.47ń0.8 F0= 8.47 tau0 = 86
L1= 39.98 s1= 12.51 F1= 45.62ń5.38 tauk1= 559 1.39
sh= 10.00 Fh= 29.69 taukh= 364 1.09
L2= 49.98 s2= 22.51 F2= 75.31ń5.83 tauk2= 923 0.84
Lkn= 45.96 skn= 18.49 Fkn= 63.38 taukn= 777 1.00
Ln= 50.41 sn= 22.94 Fn= 76.58 taun = 777 1.00
----------------------------------------------------------------------
(S = tau zul. / tau y)
Dynamically Loaded Torsion Spring Excerpt
Dm = 20.49ń0.484mm d = 1.4ń0.025 mm w = 14.63 q = 1.10
n(if) = 1.833 a = 0 mm LK0 = 4.038ń2.108 mm E = 206000 N/mm˛
sigma z = 1523
======================================================================
Install.Angleř Spring Angleř Torque Nmm Sigma N/mm˛
======================================================================
delta0= 329.9ń17.0 alfa0= 0.0 T0= 0.00 sigma0 = 0
delta1= 307.0 alfa1= 22.9 T1= 130.00ń84.34 sigmaq1= 530
alfah= 30.0 Th= 170.00 sigmaqh= 693
delta2= 277.0 alfa2= 52.9 T2= 300.00ń84.34 sigmaq2=1223
deltaqn=264.0 alfaqn= 65.9 Tqn= 373.71 sigmaqn=1523
deltan= 257.5 alfan= 72.4 Tn= 410.30 sigman =1523
----------------------------------------------------------------------
FED6 - Pitch
Gradient has been added to the spring section table in the quick
output.

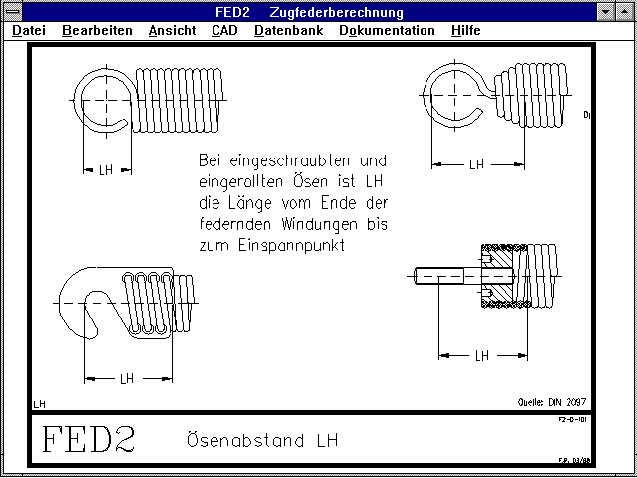
FED2 - Curled Eyes and Bolts
The length LH, for curled hooks, bolts and screw latches applies to the
distance from the clamping point at the beginning of the springy coils
(not curled coils). A new auxiliary picture has been created for this.
When selecting pictures 10 through 13, the number of curled end coils
is required for the calculation of the wire length and weight. For this
idea I would like to thank Mr Himmer of Hirsch Springs in Marktredwitz,
Germany.

HPGLMAN, HPGLVIEW: Windows NT Driver
Files plotted with HP-GL/2 under Windows NT were shown back-to-front in
HPGLVIEW and HPGLMAN. The driver's SC command caused this unusual
scaling. The files are now shown correctly.
Compressed Printout
The reduction of pages printed out in the compressed printout is
due to the separating lines not being printed. In addition, the last
page was missing when printed on Windows' printers. This error has been
corrected and now all pages are printed out.
HEXAGON Demo Software in Decker Machine Elements
The newest edition of the specialist book "Decker Machine Elements"
(German: Decker Maschinenelemente, Publisher: Hanser, ISBN
3-446-19382-0) includes a CD ROM containing demo versions of all
HEXAGON programs and a student version of WL1 along with Excel
spreadsheets for calculation examples. The book can be obtained at a
price of DM 69.80 from HEXAGON, book shops or directly from the
publisher: Hanser, www.hanser.de/fachlit/ .
Decimal Point: Comma instead of Point
It is now possible to configure in all programs whether the comma or
point should be used to display decimals. This is especially important
when exporting tables to Excel, Quattro Pro, etc. Depending on the
language or settings a point or a comma may be used.
Price List |
Order |
E-Mail |
Homepage
